Posts

Showing posts with the label photos

My First Bib-Front Gown

Image
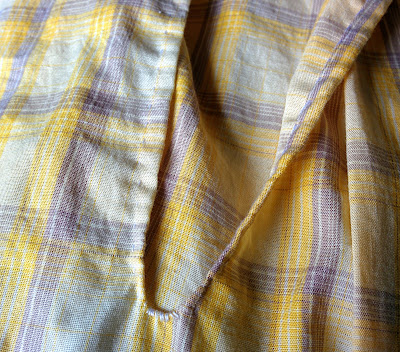
Somehow, I'd never made a bib-front gown before. But when I was given a length of cotton by a new friend at the 2018 regional CSA symposium, I knew it was going to be for something from  Regency Women's Dress - and as that was the place where I realized that the awkwardly-fitting stays I'd made years before were actually transitional , I wanted to sew a transitional gown as well to wear over them. The one I eventually made is based on both bib-front patterns in  RWD : the bodice is from the one with long sleeves (at the Fenimore Art Museum, p. 42), and the skirt from the other (at Old Sturbridge Village, p. 46). Scaling and sizing it up was not too problematic - I think the trickiest part was figuring out the appropriate size for the bib. The sleeves I didn't even touch, as the sleeve head is very large and my forearms are slim, but the fit was ... very close. They're also long, cut to scrunch up on the arm, which I love Me and Katie Lovely ! Both of us in pr...

The Clarissa Dress (Part III)

Image
This one has a lot of progress images! When I cut out the sleeves, I figured that because the pattern ( Regency Women's Dress , p.98) appeared to fit me at the wrist, I could just cut out the sleeve exactly as drawn. Not so! I sewed the seam on one and it was far too tight in the forearm, so I pieced in a tapered strip under the arm, which I did not bother to match as it cannot be seen. The next step after that was to hem the part of the seam left open near the wrist and pin the trim into place - note that the trim pieces are not symmetrical and must be matched with the proper sleeve. The cuffs were then piped all the way around, and sewn down on one long and two short sides. The remaining side was put right-side-to-right-side over the trim and end of the sleeve and sewn down through all layers. The corners were snipped to allow the allowances to be turned in. Then I turned to the armscyes. These needed to be cut into, mostly in front, to be big enough...

The Clarissa Dress (Part Two)

Image
So, after getting the bodice mostly ready to go, I turned to the skirt. The pieces were easy enough to cut out: if you look at the pattern ( Regency Women's Dress , p.98), you can see that there are mostly rectangles, plus one gore on each side. It was fairly simple - I used the same proportional method that I did on the bodice. If the front panel on the original was (for example) 150% of the waist before pleating, I made mine 150% of my waist; if the pleated width was 50% of the waist, I pleated it down to 50%. For the gore, I increased the top this way and then ran the slanted seam down at the same angle as in the original. The back panels ended up at about 26", so I just used the full width of the fabric (60") and cut a slit in it for the opening, which I turned and sewed with underhand hem stitch (more frequently known by its French name, point à rabattre sous le main ), whipping over the unturnable bit at the bottom. All of the seams were sewn with a small run...

The Clarissa Dress (Part One)

Image
I like giving my projects names - in this case, it's the "Clarissa dress" because I made it to portray Clarissa Moody Wright (1804-1871) in Canton's Dairy Festival Parade. It was difficult to figure out exactly what date to aim for: Clarissa was ten years younger than her husband, but the man who was going to portray Silas* is ... well, there's a larger age difference; I also look young for my age by modern standards and very  young by early nineteenth century standards. So should I dress as Clarissa would have as a long-married woman, or as the age that I look? In the end, I decided that a) it's not much of an educational event, as I won't be doing any actual interpreting, b) nobody in the crowd bar three or four people is going to have any idea that I'm representing a real person, let alone who she is and when she was alive, and c) I really wanted to sew the green checked dress from the mid-1820s from Regency Women's Dress . That seems fair to me...

Running the Show

Image
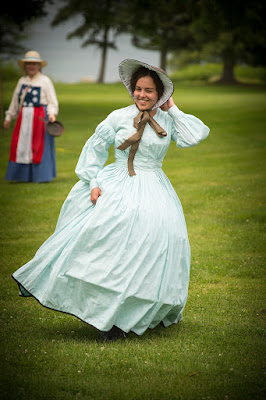
This past weekend was the first reenactment that I've actually been in charge of. (Some of you may pause to chuckle.) At last year's Civil War Weekend at Robert Moses State Park in Massena, I attended with the director of the museum as a kind of deputy - running errands that needed to be run, taking pictures so we would have something new to use in publicity next year, and so on. This year, it was all on my shoulders - the preparation leading up to the day, and the on-site work during the reenactment. This is a picture taken of me last year - I wore the same secondhand dress this time, but with all the new underthings I've made for the HSM, so you do not actually see each rung in the hoop, even when the wind blows. I also have a new bonnet: a straw Flora Francine form from Timely Tresses, trimmed with ribbon from Bulldog and Baum . New pictures ... someday, if someone else took a picture of me and I find it! It was definitely an experience . You really don't re...

HSM 2016 Challenge #4: Gender Bender

Image
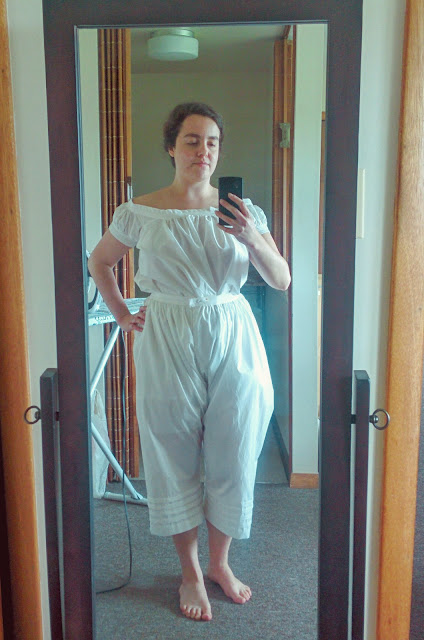
The Challenge: #4, Gender Bender. I know what you're thinking, but if we go back a few decades drawers were really controversial  for women - they simply didn't wear bifurcated garments. So even though I'm not aware of the attitude that drawers were inherently gender-bending still existing in the middle of the nineteenth century, I'm counting it because I really need drawers for my presentation. Fabric/Materials: White Pimatex cotton from Dharma Trading Co. at $6.79/yd. I'm not sure of exactly how many yards I ended up using - after making my chemise, there was only enough left for one leg, so I bought two more yards and didn't use all of that. I think it's probably about two yards in total? Pattern: From the drafting instructions by Liz Clark on the Sewing Academy Compendium. I was going to get out a pair in the collection and pattern them and base mine off that, but then I realized that that made no sense. The instructions are very clear and sim...

HSM 2016 Challenge #3: Protection

Image
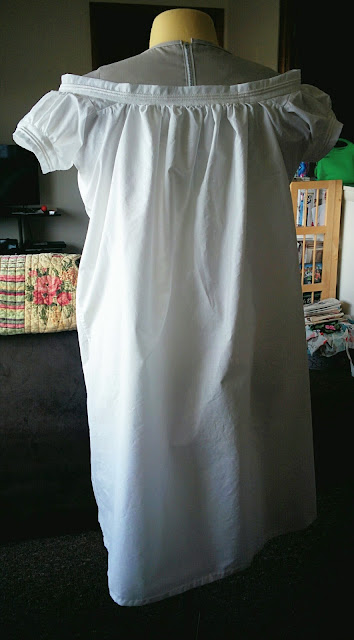
For the "Protection" challenge, I made a chemise to wear for the Civil War Weekend. Chemises, of course, protect your skin from the corset, and your corset (and other clothes) from your skin, and so are a perfect thing to make as an example of a protective garment. This is the pattern I used , which I took while working at the Chapman Historical Museum. It would be a very good one for a first attempt at scaling up a pattern - I strongly recommend it if you have any interest in practicing that skill. That said, the actual making is tricky. There's a lot of gathering, and since the original had the bands attached by machine I didn't do stroked gathers, which are in a way simpler and hang better. I really should have used a smaller cording (the original has five rows) and should have started it much closer to the fold, so as to have more room for the seam allowances. I had to trim them quite close. Setting in the neckline gussets was also a tricky annoyance. Th...

HSM 2016 Challenge #2: Tucks and Pleats

Image
Last year at my museum's Civil War Weekend, I was not very well kitted out. I had a decent corset, a good cage from Kay Gnagey (worth the money, by the way), a secondhand dress that fit perfectly, an 1840s chemise that's too tight under the arms, and a knee-length 1950s-style crinoline I used as a petticoat (which was awful but better than nothing). So the plans I laid out in December have been changed, because without firm deadlines I won't finish anything. Instead, I'm using the first half of the year to get everything together, starting with a pair of petticoats. This is especially important as I'm going to do a "Dressing the Fashionable Woman" presentation and need to have every layer in viewable condition. Petticoat, 1850-1865; MMA 2009.300.3256 (OASC) Liz Clark's instructions for petticoats describe pretty much what I did; I used the patterns at the end of Patterns of Fashion I  to calculate how much yardage to buy, and otherwise just sor...

HSM 2016 Challenge #1: Procrastination

Image
Talk about procrastination! I started this dress the same time last year, after I finished a sloppy version of Sabine's short corset to wear under it. I got as far as attaching the front of the bodice to the skirt before feeling like it just wasn't working, and not having the prospect of any era-appropriate events in the near future, set it to one side. But then Regency Women's Dress  came out, and I moved up to the Canadian border, and I was asked to speak about women's clothing at an event this winter, and I needed to finish this. Although it's turned out that I won't be able to do that event, I still needed to finish it! Sometime after moving, I found a wearable mockup long corset I'd made and never gotten around to copying and doing up properly. (NB: I still haven't!) it didn't/doesn't fit quite properly, but the important thing is that it creates the 1810s silhouette, lifting the bust above the natural level. Because of this, I was abl...

Hallowedding!

Image
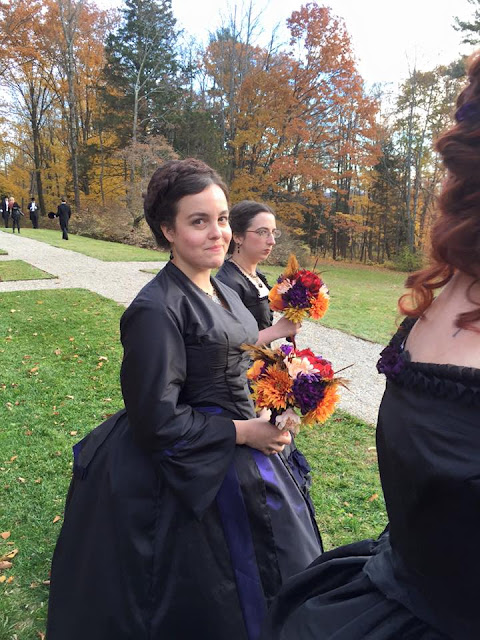
Now that several months have passed, it's time to post about my Halloween costume. Last year, I participated in the coolest wedding - early bustle themed! Julie (the bride) made her dress from a purple faille, and got purple faille and black taffeta for all the bridesmaids for us to each make a dress or have a dress made. (And then Julie made like six other dresses, she's terrifyingly productive.) On the lawn at Ventfort, doing photos  The wedding was held at Ventfort Hall , a really gorgeous Gothic Revival mansion in western Massachusetts that was the most lovely setting for an historical wedding you could imagine. Lacing corsets! There was a makeup artist and two hairstylists; I did my own makeup, but happily acceded to the ministrations of a trained hair professional because I'm completely incapable of doing anything with my hair. I did bring the hair I've been saving from my comb, which the hairdresser used as a big rat base. (Julie also lent me a braid...